- If the process is active,
- In the Inactive Approval Processes related list select Edit against the process you want to edit:

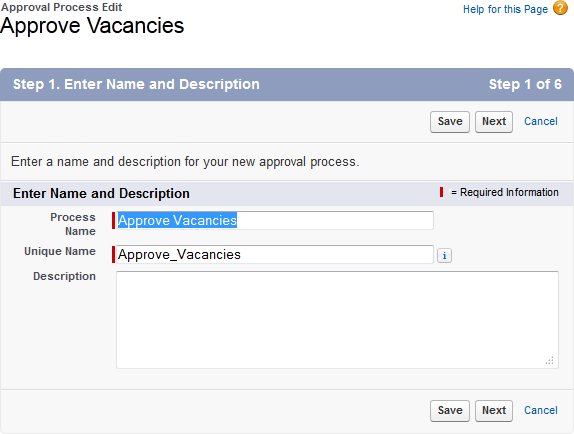
Sage People displays Step 1 of the Approval Process Edit wizard:
-
You can rename the process if you need to, and add a description to clarify the role of the process. If you change the Unique Name ensure that it conforms to the standard rules for unique names:
- Begins with a letter.
- Includes only alphanumeric characters and underscores.
- Cannot end with an underscore.
- Cannot include two consecutive underscores.
Renaming the process overwrites the original process - it does not preserve the original with the original name.
-
Select Next.
Sage People displays Step 2 of the Approval Process Edit wizard:

Criteria specified here must be met before a record can enter the process; records that do not meet the criteria can still be created but they cannot progress.
Aprove Vacancies
Request to Hire Entry Criteria
Typically, if you are setting up an approval process for vacancies you will want all vacancies to enter the process and be passed or rejected by the process. In that case, leave entry criteria blank so that there are no barriers to entry.
Authorising Manager must be defined on the application.
- To add extra entry criteria, complete Field, Operator and Value fields for each new criteria.
To change the process to use a formula to qualify new vacancies, select the picklist for Use this approval process if the following and choose formula evaluates to true. Then enter your formula.
- Select Next.
Sage People displays Step 3 of the Approval Process Edit wizard:

- To automatically route approval requests to the manager of the person creating the record, select the picklist for Next Automated Approver Determined By and choose Manager.
To define an approval process where each approval is separately determined by the steps in the process, select the picklist for Next Automated Approver Determined By and choose None.
-
In the Record Editability Properties section, select the radio button for the type of constraint you want to place on editing records during the approval process:
- Administrator-only editing.
- Administrator and the currently assigned approver can edit.
- Select Next.
Sage People displays Step 4 of the Approval Process Edit wizard:

- To specify an email template to request approval, select Approval Assignment Email Template lookup
 , find and select the template you want to use.
The same template is used for all steps in the process.
If you do not specify a template, Sage People uses the standard Salesforce template.
If you do not have a template and want to create one, select Create a new email template.
-
Select Next.
Sage People displays Step 5 of the Approval Process Edit wizard:

This step enables you to define the fields visible to the approver.
Aprove Vacancies
Request to Hire Visible Fields
Vacancy Name
Owner
Hiring Manager
Description
Key Responsibilities
Location City
Employment Type
Salary Period
Salary Minimum
Salary Maximum
Salary Negotiable?
Includes Benefits?
Salary OTE?
If you are using the Sage People Job Requisition process, the fields visible on the Requisition are controlled by the Requisition Details Field Set, not by this step.
Application Number
Owner
-
To add a field to the display, select the field in Available Fields and select Add
 .
.To remove a field from the display, select the field in Selected Fields and select Remove
 .
.To change the order in which fields are displayed, select a fields in Selected Fields and select Up
 or Down
  .
. -
Select Next.
Sage People displays Step 6 of the Approval Process Edit wizard:

This step enables you to specify which users can submit a record for approval.
Approve Vacancies Request to Hire Allowed Submitters
Vacancy Owner
Application Owner
-
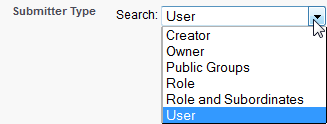
To add more Allowed Submitters, select the Search picklist and choose a Type:
The list of Available Submitters displays all submitters of the type selected:
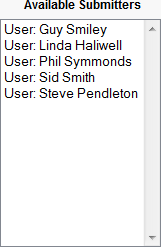
Select an Available Submitter and select Add
. -
To permit submitters to recall approval requests they have submitted, in the Submission Settings section check Allow submitters to recall approval requests.
-
Select Save.
Sage People displays the Approval Process Detail page for the process you have just edited.